Wolfram Function Repository
Instant-use add-on functions for the Wolfram Language
Function Repository Resource:
Add ray traced bump and highlights to an image
ResourceFunction["ImageRayTraceBump"][img] uses ray tracing to simulate bump shading and specular highlights based on the brightness channel of img. | |
ResourceFunction["ImageRayTraceBump"][img1,img2] simulates bump shading and specular highlights in img1 based on the brightness channel of img2. |
| "BumpBlur" | 1 | radius of the blur applied to the bump map |
| "BumpHeight" | 10 | how high the bump appears to be |
| "EyeHeight" | 600 | how high, in pixels, is the viewer |
| "LightPosition" | {-2,2,1} | where the light appears to be coming from |
| "LightType" | "Directional" | what kind of light is shining on img |
| "Shininess" | 5 | how reflective the surface of img appears to be |
| "Directional" (default) | light hits each pixel from the same direction and then bounces towards the observer. |
| "Point" | light travels from one location to each pixel and then bounces towards the observer. |
| "Uniform" | light hits each pixel from the same direction and then bounces straight upward. |
Add bump to an image:
| In[1]:= | ![(* Evaluate this cell to get the example input *) CloudGet["https://www.wolframcloud.com/obj/6419810b-b6da-4c3f-9b9f-09656dd38636"]](https://www.wolframcloud.com/obj/resourcesystem/images/c7d/c7d5d452-f345-44a7-ae69-c12cf38ace6e/5baa405209013676.png) |
| Out[1]= | 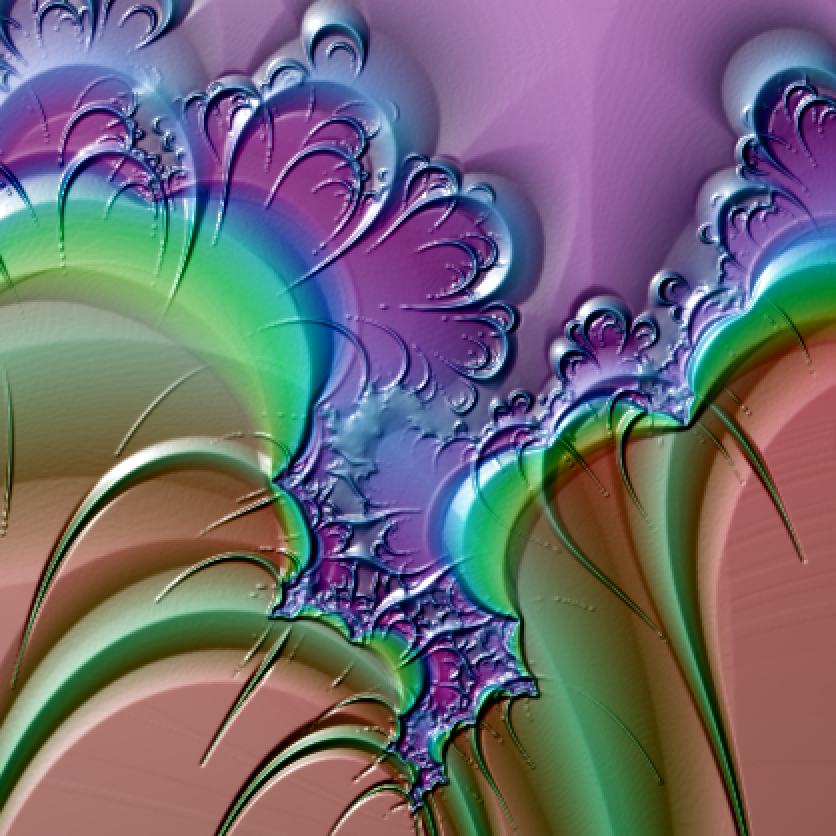 |
Add bump from one image to another:
| In[2]:= | ![(* Evaluate this cell to get the example input *) CloudGet["https://www.wolframcloud.com/obj/132cd63e-dac0-484f-aee4-9a6e86d6610a"]](https://www.wolframcloud.com/obj/resourcesystem/images/c7d/c7d5d452-f345-44a7-ae69-c12cf38ace6e/55b2ed39f3cdf664.png) |
| Out[2]= |  |
In ImageRayTraceBump[img1,img2], the two images need not be the same size. If either dimension of img2 is smaller than that of img1, it reflects and tiles:
| In[3]:= | ![(* Evaluate this cell to get the example input *) CloudGet["https://www.wolframcloud.com/obj/6f2b8fc1-f3b4-445f-aabc-a05bcc34c01c"]](https://www.wolframcloud.com/obj/resourcesystem/images/c7d/c7d5d452-f345-44a7-ae69-c12cf38ace6e/3698268443e184ed.png) |
| Out[3]= | 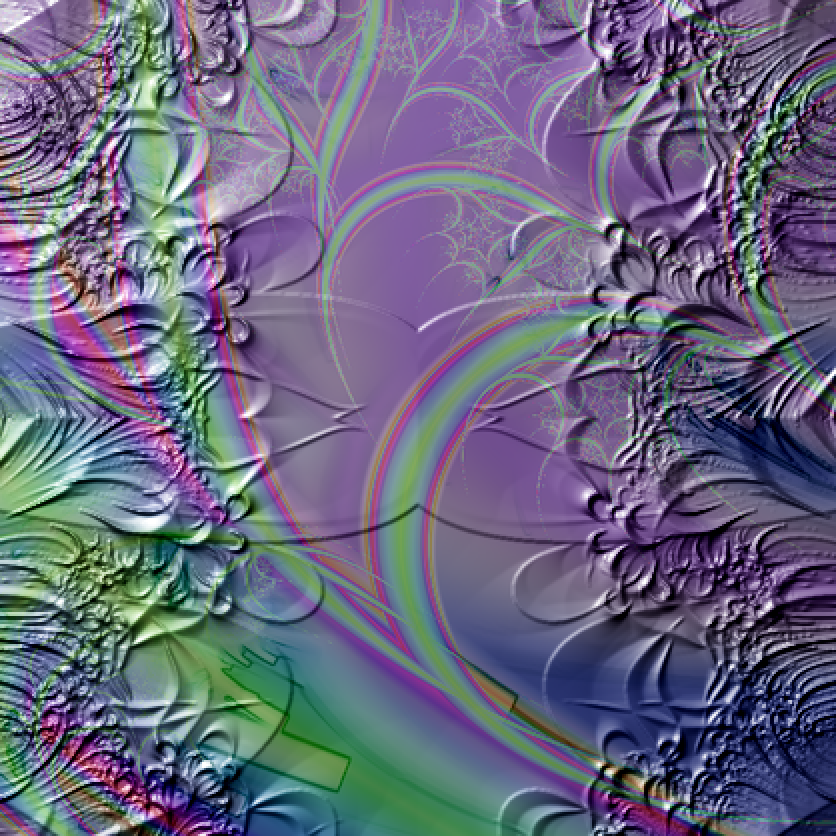 |
If a dimension of img2 is larger, img2 covers img1 starting in the top left corner:
| In[4]:= | ![(* Evaluate this cell to get the example input *) CloudGet["https://www.wolframcloud.com/obj/36b61874-e075-40c3-8ac3-6ee491fcab58"]](https://www.wolframcloud.com/obj/resourcesystem/images/c7d/c7d5d452-f345-44a7-ae69-c12cf38ace6e/2ea1cbc4465f02fb.png) |
| Out[4]= | 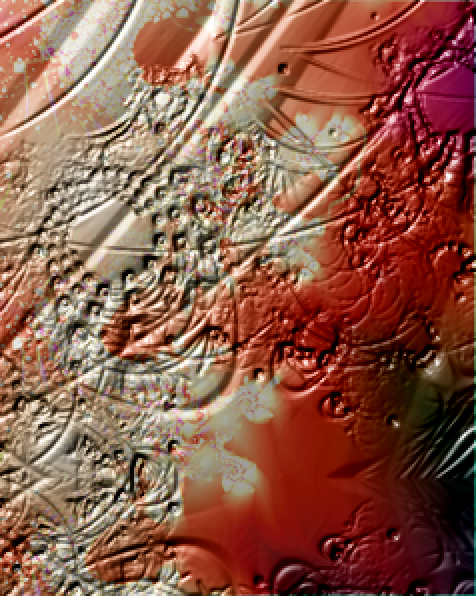 |
The option "BumpBlur" sets the radius for the blur filter of the bump map. Values should be non-negative integers. Practical settings are 0 ≤ n ≤ 8 where n is a real number. If small features are causing too much salt-like reflections, increase this setting a little:
| In[5]:= | ![(* Evaluate this cell to get the example input *) CloudGet["https://www.wolframcloud.com/obj/1f8f38cc-db23-4d44-8ce5-9261ad04e773"]](https://www.wolframcloud.com/obj/resourcesystem/images/c7d/c7d5d452-f345-44a7-ae69-c12cf38ace6e/1ee40268c4d45fdf.png) |
The option "BumpHeight" sets the apparent height:
| In[6]:= | ![(* Evaluate this cell to get the example input *) CloudGet["https://www.wolframcloud.com/obj/12a8eab0-c0bc-470f-92ec-297eb735a19f"]](https://www.wolframcloud.com/obj/resourcesystem/images/c7d/c7d5d452-f345-44a7-ae69-c12cf38ace6e/7d86b61242af27fd.png) |
| Out[6]= | 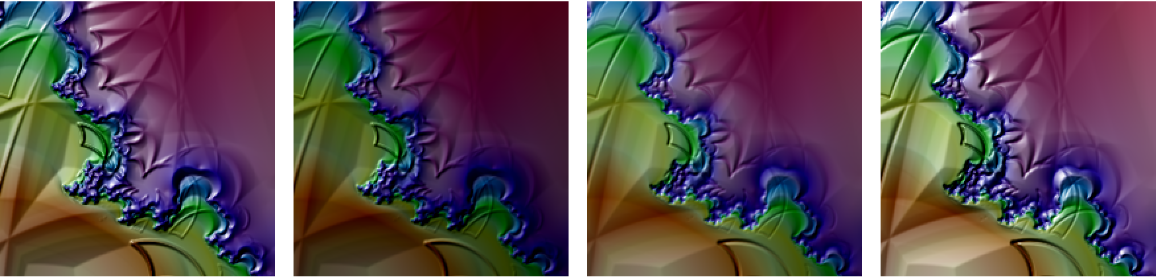 |
One solution for too much glare from the light source is to increase the height of the observer via the "EyeHeight" option value:
| In[7]:= | ![(* Evaluate this cell to get the example input *) CloudGet["https://www.wolframcloud.com/obj/078e4424-04fa-424b-a5e5-4c9233123398"]](https://www.wolframcloud.com/obj/resourcesystem/images/c7d/c7d5d452-f345-44a7-ae69-c12cf38ace6e/71b438e87fee6a18.png) |
| Out[7]= | 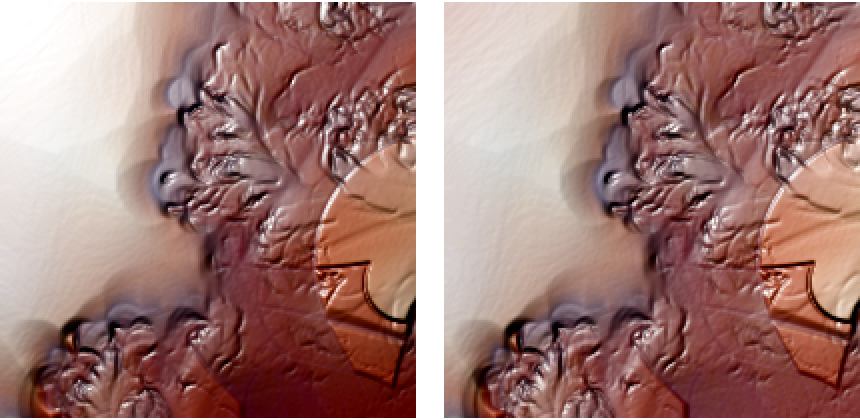 |
For the default "Directional" and the "Uniform" light types, the option "LightPosition" sets the direction from which every pixel receives light. The vector is from the light position to the center of the image:
| In[8]:= | ![(* Evaluate this cell to get the example input *) CloudGet["https://www.wolframcloud.com/obj/936d0365-59a4-408d-89e2-613ce05d1d26"]](https://www.wolframcloud.com/obj/resourcesystem/images/c7d/c7d5d452-f345-44a7-ae69-c12cf38ace6e/164f55626aeaa1fc.png) |
| Out[8]= | 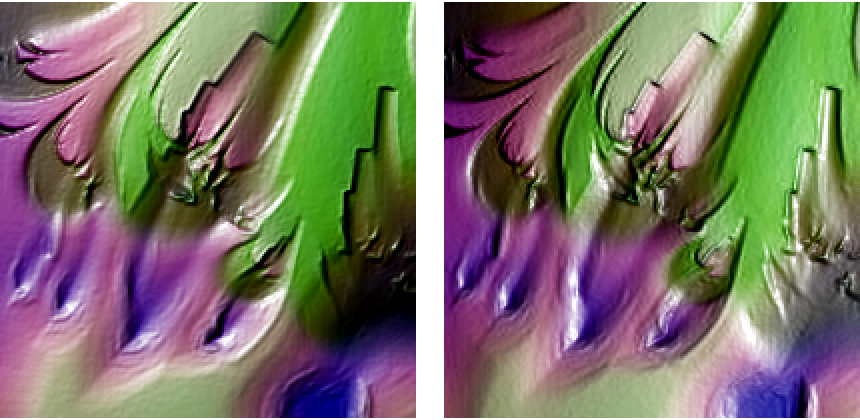 |
For the default "Point" light type, the option "LightPosition" sets the location from which every pixel receives light:
| In[9]:= | ![(* Evaluate this cell to get the example input *) CloudGet["https://www.wolframcloud.com/obj/77f78b92-80ed-4eef-aa0a-9e1bc8dd5c1f"]](https://www.wolframcloud.com/obj/resourcesystem/images/c7d/c7d5d452-f345-44a7-ae69-c12cf38ace6e/17c9d927c3e8dd26.png) |
| Out[9]= | 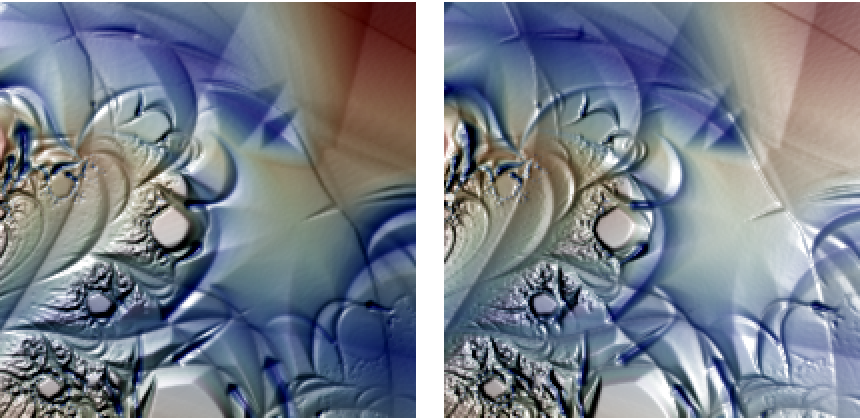 |
The "LightType" option controls how the light source behaves:
| In[10]:= | ![(* Evaluate this cell to get the example input *) CloudGet["https://www.wolframcloud.com/obj/067652db-298d-47de-9f7d-89b6b7169956"]](https://www.wolframcloud.com/obj/resourcesystem/images/c7d/c7d5d452-f345-44a7-ae69-c12cf38ace6e/21fbdd0a12fe304e.png) |
| Out[10]= | 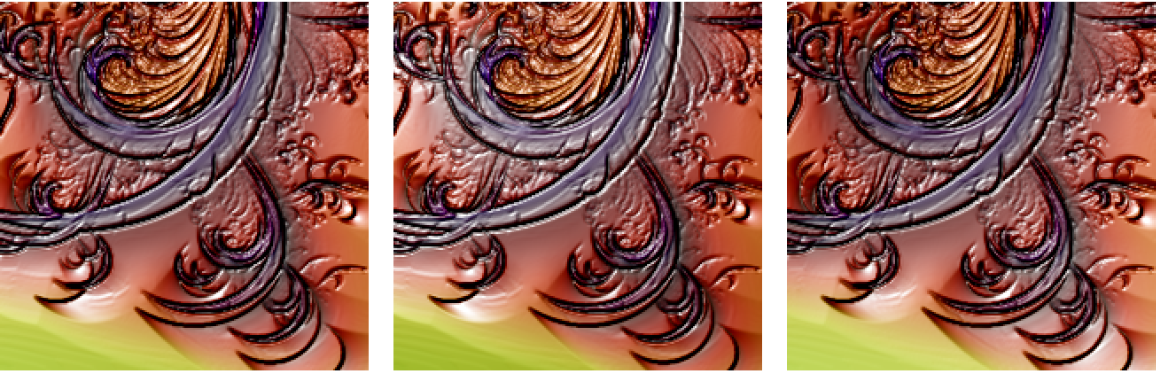 |
Low settings will look rough or dull; high settings will look wet or glassy. Practical values are 0≤n≤10,n∈ℝ:
| In[11]:= | ![(* Evaluate this cell to get the example input *) CloudGet["https://www.wolframcloud.com/obj/15ca5fbc-1c7b-45f5-aa6a-2b16c400fe81"]](https://www.wolframcloud.com/obj/resourcesystem/images/c7d/c7d5d452-f345-44a7-ae69-c12cf38ace6e/4a99da6646343b8a.png) |
| Out[11]= | 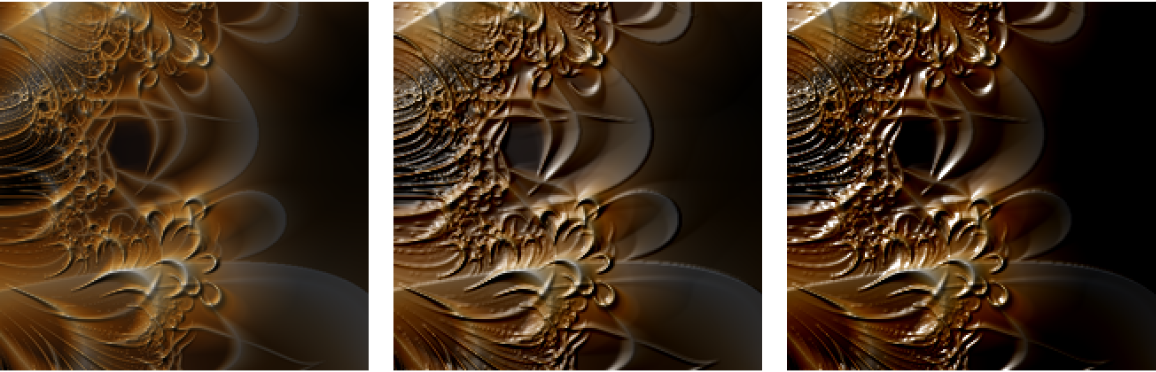 |
Give a photo, like this of an elephant's hide, a subtle 3D realism:
| In[12]:= | ![(* Evaluate this cell to get the example input *) CloudGet["https://www.wolframcloud.com/obj/47ff9009-682a-4928-a671-b644eb8c5d89"]](https://www.wolframcloud.com/obj/resourcesystem/images/c7d/c7d5d452-f345-44a7-ae69-c12cf38ace6e/6a524531d97233f5.png) |
| Out[13]= | 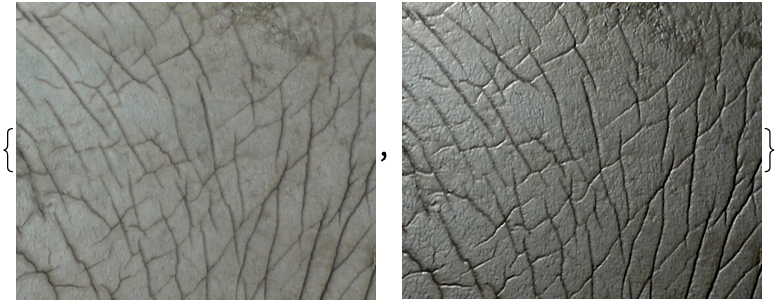 |
Use ImageRayTraceBump as an artistic filter:
| In[14]:= | ![(* Evaluate this cell to get the example input *) CloudGet["https://www.wolframcloud.com/obj/4961ba8f-dad7-4c8c-a9ae-581ca05ed982"]](https://www.wolframcloud.com/obj/resourcesystem/images/c7d/c7d5d452-f345-44a7-ae69-c12cf38ace6e/7511acad1d2de760.png) |
| Out[15]= | 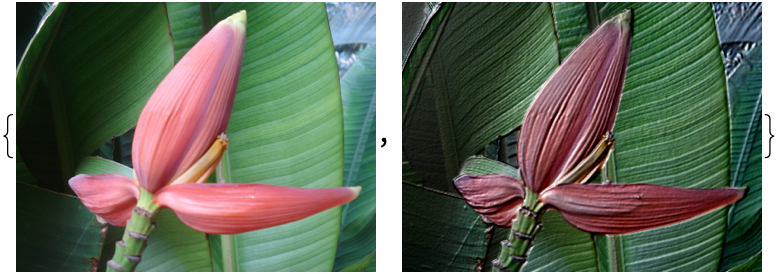 |
Combine two procedural images (here, a density plot and a graphic of overlapping polygons) to create snakeskin:
| In[16]:= | ![(* Evaluate this cell to get the example input *) CloudGet["https://www.wolframcloud.com/obj/88e08b1c-1473-4c3d-8139-24f529b4ca12"]](https://www.wolframcloud.com/obj/resourcesystem/images/c7d/c7d5d452-f345-44a7-ae69-c12cf38ace6e/3fb1fe4d44e07412.png) |
| Out[16]= | 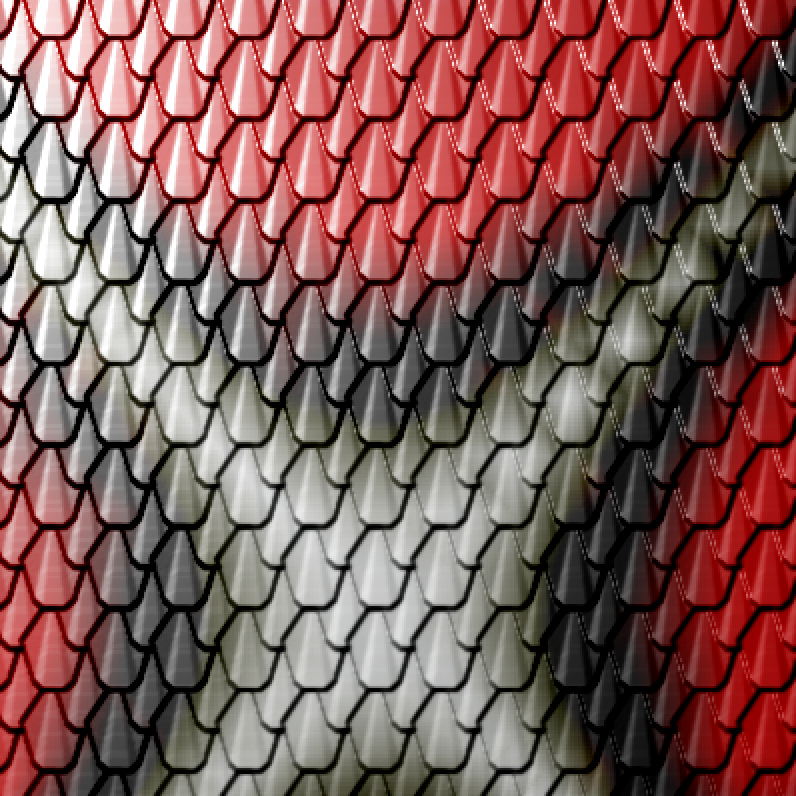 |
Animate the light position:
| In[17]:= | ![(* Evaluate this cell to get the example input *) CloudGet["https://www.wolframcloud.com/obj/f999c46b-5189-4785-a2d5-1764f9196596"]](https://www.wolframcloud.com/obj/resourcesystem/images/c7d/c7d5d452-f345-44a7-ae69-c12cf38ace6e/2ac65467ed4d3ceb.png) |
| Out[17]= | 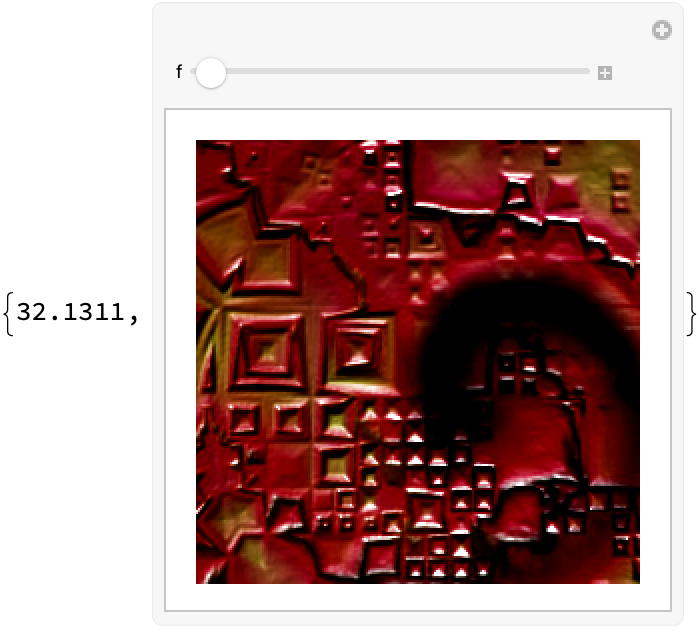 |
This work is licensed under a Creative Commons Attribution 4.0 International License